Boy do I hate summer. I dislike heat over 80 degrees. You can imagine what 106 and HORRIBLY humid does to me. YEAH, Poor Tom. I am not a nice person in the heat. I get cranky and sad. I am continuing my running, weights and exercise videos, but it's just gross in the heat.....YUK. I will take 65, partly cloudy ANY DAY.
And COOKING? Well it's a just a chore when it's so hot and horribly uncomfortable. AND, since it's my hobby and something I am truly happy doing, I hate feeling like that. BUT the summer blahs are here.
I will get used to it and grind through the summer. But the heat came on so hard and so fast that I literally feel fried. So a fresh fruit smoothie sounded so good, so easy, so cool and so satisfying. Thank goodness for blenders!! It's like having summer in a cup!! (only healthier and without the darn heat!!)
I almost always have pineapple and Mexican papaya's (the pink fleshed ones) peeled and cubed in ziploc baggies in the freezer. I put them in serving sizes of 1 cup each. This way, when I want the fruit in a recipe (think salsa, sauces, smoothies, or fruit cocktail) I can just pull them out when I need them and I don't have to mess with preparing the fruit each time. Trust me...when you want a smoothie, you want it NOW.....so it's kind of cool to be as prepared as your local smoothie shop....just pour everything in and GO!
SUPER REFRESHING. This is the stuff HAPPINESS is made of when it's hot outside. You and your family will be refreshed AND nourished without digging into high calorie ice cream treats!
Pineapple, Mango and Papaya Smoothies
Makes 2 filling servings
1 cup mango
1 cup pineapple
1 cup Pink fleshed papaya
1 8 oz container of Greek yogurt ( Chobani or Fage) FAT FREE (I used plain because that's what I had, but vanilla, peach, etc..would be awesome)
1 cup ice cubes
1/2 cup warm water if your fruit is NOT FROZEN, don't add the water.
1 packet (or more to taste) Artificial sweetener
Prepare your fruit into chunks and get out your yogurt.
In your blender, in this order, place yogurt, water (if using), sweetener, all three fruits, and the ice cubes.
** I snapped the picture Prematurely - without the water and ice cubes. Yep....it happens to the best of us....! LOL
Blend until very smooth and creamy, and pour/scoop into your desired glass.
** If your blender gets frozen, stop it and add more warm water and blend again until desired consistency is reached.
The result? A VERY creamy, ice cream like smoothie that is perfect for Breakfast, or anytime you need to be refreshed. It's definitely a cure for all of us heat exhausted peeps!! Try adding different fruits, flavored yogurts and/or herbs (mint, a bit of basil ??)....Have fun with it!
From my home to yours, ENJOY!!
Wednesday, July 6, 2011
Sunday, July 3, 2011
Georgina's Green Enchilada's
A couple of weeks ago I had two friends from my "old" place of employment over for a "cooking night". It was great seeing them. It made me realize how much I miss them.....then later it made me realize how much I miss everyone over there. It's weird when you spend 11 years with the same people, it's hard not to think of them often and miss that part of working in an office environment.
Don't get me wrong. I love my job. I love working from home. I love my life right now....it's probably the best it's been in a very long time, maybe EVER. I have a great husband who I try not to take for granted, two of the MOST gorgeous grand kids anyone could ever want, and we are at the precipice of building our our dream home in Washington. I mean really...How many blessings can one person take?
But in the quiet moments nostalgia sets in and I remember people who have touched my life. Georgina is one of those people for many reasons, and I find myself missing her so much.
Then I think, Hmmmm - is it her I miss or her INCREDIBLE Green enchiladas I miss so much? HAHA- Of course, I miss "smorgy" (as I called her) but I have to say...the Green Enchiladas are such a close second that I had to stop and think about it for a minute!
She has graciously given her blessing for me to post her family's recipe for these delicious rolls of green goodness as she patiently directed me via telephone. Her mother has been making this for over 40 years and Georgina is following the tradition.
I was thrilled to make this recipe. I am more thrilled to post it for all of you. They were delicious, the real deal! But while we were eating, I couldn't help but feel something was missing. Yep, Georgina was'nt part of the equation. Had she been here, it would have felt like old times.
Making great food is more than recipes and cooking technique. It's about the home, your friends and your family - that's the touch no accomplished chef can give to a meal. That part is up to us.
Green Enchilada's
Compliments of Georgina Mancillas
Thanks my friend!
Put sauce into a sauce pan and warm and preheat your oven to 350 degrees.
Bake for about 20 minutes. Let stand 5 minutes before serving - serve with Mexican Crema or sour cream if desired.
The result? An authentic enchilada with an absolutely delicious and fresh "old world" flavor. To me? It tastes like "home" because of my friend. For you, maybe it will be a new family favorite!! Either way, these enchiladas are worth making!
From my home to yours, ENJOY!!
Don't get me wrong. I love my job. I love working from home. I love my life right now....it's probably the best it's been in a very long time, maybe EVER. I have a great husband who I try not to take for granted, two of the MOST gorgeous grand kids anyone could ever want, and we are at the precipice of building our our dream home in Washington. I mean really...How many blessings can one person take?
But in the quiet moments nostalgia sets in and I remember people who have touched my life. Georgina is one of those people for many reasons, and I find myself missing her so much.
Then I think, Hmmmm - is it her I miss or her INCREDIBLE Green enchiladas I miss so much? HAHA- Of course, I miss "smorgy" (as I called her) but I have to say...the Green Enchiladas are such a close second that I had to stop and think about it for a minute!
She has graciously given her blessing for me to post her family's recipe for these delicious rolls of green goodness as she patiently directed me via telephone. Her mother has been making this for over 40 years and Georgina is following the tradition.
I was thrilled to make this recipe. I am more thrilled to post it for all of you. They were delicious, the real deal! But while we were eating, I couldn't help but feel something was missing. Yep, Georgina was'nt part of the equation. Had she been here, it would have felt like old times.
Making great food is more than recipes and cooking technique. It's about the home, your friends and your family - that's the touch no accomplished chef can give to a meal. That part is up to us.
Green Enchilada's
Compliments of Georgina Mancillas
Thanks my friend!
1 whole chicken, boiled
12-15 large tomatillos, husks removed and fruit quartered
Knorr chicken flavored bouillon granules
5 jalapenos, top cut off, left whole
1 onion, roughly chopped
3-5 garlic cloves
1 bunch cilantro
Salt and pepper
Approx. 2-3 cups, shredded jack cheese (use light, if you want to lighten it up)
12 corn tortillas
Put chicken in pan and cover with water. Season water with several tablespoons of Knorr bouillon granules. Bring to a boil and reduce heat to simmer and let chicken cook until it’s very tender. Remove chicken to dish and let cool, then shred chicken. Add some of the broth used to cook the chicken to moisten it. Set chicken aside.
*** I cheated here - I used Chicken breast tenderloins and poached them in the Knorr bouillon water till tender. I have to admit. It's a great "fast way" of making these...but the flavor and tenderness wasn't what the whole chicken would have been.
In case you are unfamiliar with Knorr Bouillon granules, I have a picture below....you can find it usually in the soup section or Mexican food section of the market:
*** I cheated here - I used Chicken breast tenderloins and poached them in the Knorr bouillon water till tender. I have to admit. It's a great "fast way" of making these...but the flavor and tenderness wasn't what the whole chicken would have been.
In case you are unfamiliar with Knorr Bouillon granules, I have a picture below....you can find it usually in the soup section or Mexican food section of the market:
Husk and quarter the tomatillos. In a medium sauce pan, add the tomatillos and the whole jalapeno’s and just enough water to immerse them. Bring to a boil, cover and cook until tomatillos are tender (maybe 15 minutes)
Put the cooked tomatillos and the jalapeno’s into the food processor (or blender) being careful not to add too much of the liquid from the pot. In other words, you will “semi-drain” them by utilizing a slotted spoon or pouring off most of the liquid. KEEP THE LIQUID you cooked the tomatillos in until the sauce is made. THEN, add to the processor the garlic cloves, onion, roughly chopped cilantro.
Process until fairly smooth, adding the tomatillo liquid as necessary to get an enchilada sauce consistency. Flavor the sauce with some Knorr granules.**** Taste**** you may want to add some salt and pepper, more Knorr, cilantro, etc….
Put sauce into a sauce pan and warm and preheat your oven to 350 degrees.
The authentic way is to heat some oil in the pan and soften the tortillas in the oil, remove to a plate and add shredded chicken and Cheese, roll up and place seam side down in a 13X9 pan. If you can afford the calories, go ahead and do that, I didnt.
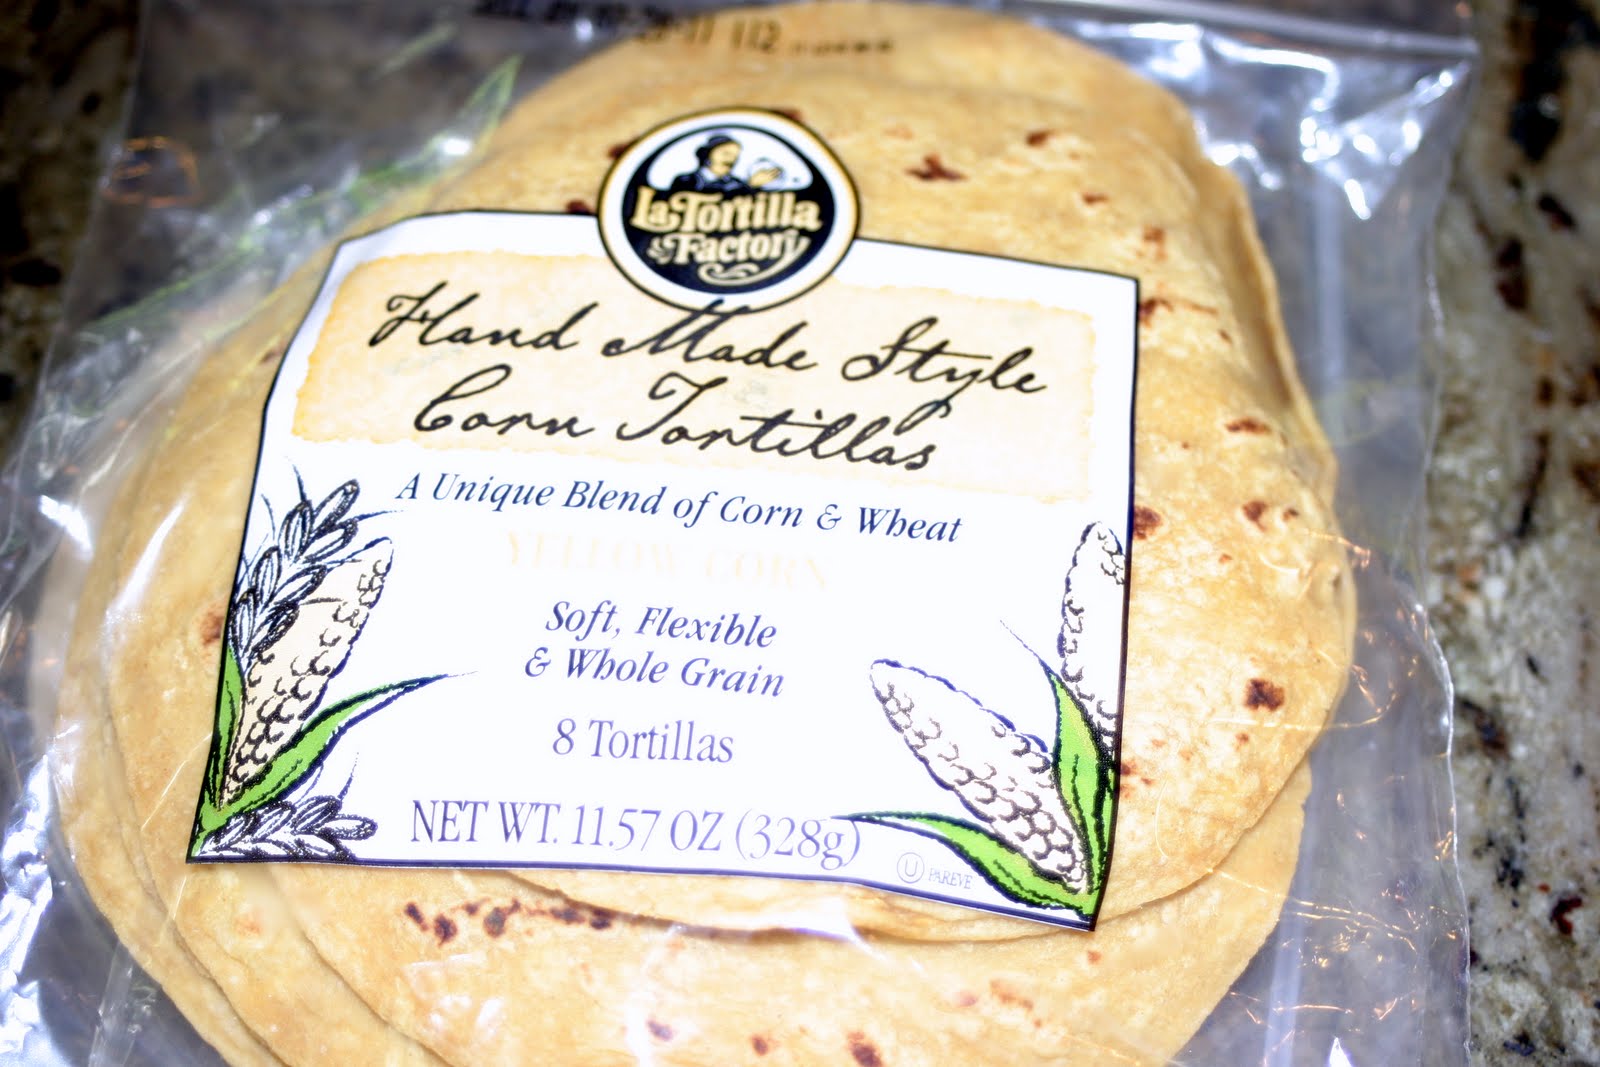
I am a FREAK for these Homemade style La Tortilla factory tortillas...so good and so toothsome - they have a great chewy texture that doesnt get destroyed in the baking process.
Instead, simply warm the tortillas carefully in the microwave, then dip each one in the sauce, add chicken and cheese :
Then roll up the enchilada and place them seam side down in a SPRAYED 13X9 pan.
I am a FREAK for these Homemade style La Tortilla factory tortillas...so good and so toothsome - they have a great chewy texture that doesnt get destroyed in the baking process.
Instead, simply warm the tortillas carefully in the microwave, then dip each one in the sauce, add chicken and cheese :
Then roll up the enchilada and place them seam side down in a SPRAYED 13X9 pan.
The result? An authentic enchilada with an absolutely delicious and fresh "old world" flavor. To me? It tastes like "home" because of my friend. For you, maybe it will be a new family favorite!! Either way, these enchiladas are worth making!
From my home to yours, ENJOY!!
Tuesday, June 28, 2011
Tandoori Spiced Grilled Game Hens
I have been experimenting with different flavor profiles recently....Some Indian, Middle Eastern and Moroccan mostly. So last night I made this tagine of Chicken with a tomato, saffron and honey sauce. I got the recipe out of my new book called "The new book of Middle Eastern Food, by Claudia Roden. The dish sounded interesting and I had all the stuff to put it together, so why not? When I started making it, the recipe called out for 2 teaspoons of CINNAMON and few other spices (odd for Moroccan). I realized that 2 teaspoons was SO MUCH - definitely an "issue", so I cut the cinnamon to 1 teaspoon. But even then, it was horribly overpowering. My husbands first reaction when he walked in the house? "what the hell stinks like cinnamon?" Yeah. Not good. The meal was awful and I wasted a lot of food. But hey, that's how you know this flavor profile is not for you, right? His last statement about the dinner? "if you ever put Cinnamon in my dinner again, I am leaving you..." HAHAHA! Funny, but I actually think he meant it!
Needless to say, I WONT be posting ANYTHING about that recipe. OH well. On with today's recipe....
Ya know how sometimes you just WANT a certain food, but don't want to go to too much trouble? Lots of food is like that for me...but Indian and Moroccan are the two that seem to require quite a few ingredients and more than a bit of time.
If I have the time and if I am really in the mood, I like to "pretend" I'm an Indian restaurant - you know, the appetizer, AT LEAST two distinctly different dishes and/or a vegetable. With, of course, Basmati Rice and Naan. Yeah - SUPER fun to make, but it's a lot of work and in the summer, spending 4 hours in my kitchen sweating to death just doesn't sound good.
But what if your craving that "taste"? Try a quick spatchcocked Tandoori Cornish Hen! It was delicious and it didn't require lots of time or attention in the kitchen, Plus it fits in with outdoor summer grilling perfectly. A EXTRA BONUS - Nobody will have unwanted cinnamon in their meal!
Tandoori Spiced Grilled Game Hens
I just counted the points for the hens with skin and only one serving of oil....most of it gets cooked off.
2 Cornish game hens, prepared in a spatchcock fashion
3-4 tablespoons tandoori spice mix
1/4 cup Vegetable oil
Mix the oil and the seasoning together with a whisk and set aside. Depending on the brand it will be
Bright red or a deep rust color.
The Term Spatchcock is an actual cooking technique. It means "poultry or game that is prepared for roasting or grilling by removing the backbone and sternum of the bird and flattening it out before cooking" This explanation comes from Wikipedia and if you go to the sight and drill down, you will see the "how to" pictures in case you are interested in more detail.
Because these are little birds and easily pliable, I remove the backbone and "crack the sternum, But I don't remove the sternum. So technically this isn't a COMPLETELY spatchcocked hen.
First remove any parts or bags of "stuff" in the cavity. Wash/clean the hens. Pat them dry, inside and out. Turn the bird breast side down.
Then with kitchen shears or a VERY sharp knife cut out the back bone. I used shears only, but do what is comfortable.
I was by myself and I couldn't continue to work and take pictures with my chicken smeared hands...so I have to explain the rest.
Open the bird and put your index fingers under the breast bone with your thumb on top of the breast bone and push with your thumbs until it sort of cracks. The hen will now lay flat.
Repeat with the other hen:
Smear the spice oil all over the game hens -especially on the underside of the bird. Add some salt and pepper.
Cover loosely with plastic wrap and refrigerate for about an hour or more.
Put on a very hot BBQ grill, underside down first, and then turn. Cook until the inner temp is 170 degrees or the juices run clear and the legs is easily movable. (I prefer a thermometer) Remove from the grill to a plate and let sit for about 5 minutes.
Serve with your desired side dishes. I made basmati rice, Indian veggies and naan from a frozen package.
The result? A nicely crisp hen that is tender and delicious. Very Indian tasting without too much work, giving us that familiar Tandoori spice we all love. This was a winner. It's a recipe I will make often this summer PLUS I know the Hubster will not leave me over this dish! Yours wont either.
From my home to yours, ENJOY!
Needless to say, I WONT be posting ANYTHING about that recipe. OH well. On with today's recipe....
Ya know how sometimes you just WANT a certain food, but don't want to go to too much trouble? Lots of food is like that for me...but Indian and Moroccan are the two that seem to require quite a few ingredients and more than a bit of time.
If I have the time and if I am really in the mood, I like to "pretend" I'm an Indian restaurant - you know, the appetizer, AT LEAST two distinctly different dishes and/or a vegetable. With, of course, Basmati Rice and Naan. Yeah - SUPER fun to make, but it's a lot of work and in the summer, spending 4 hours in my kitchen sweating to death just doesn't sound good.
But what if your craving that "taste"? Try a quick spatchcocked Tandoori Cornish Hen! It was delicious and it didn't require lots of time or attention in the kitchen, Plus it fits in with outdoor summer grilling perfectly. A EXTRA BONUS - Nobody will have unwanted cinnamon in their meal!
Tandoori Spiced Grilled Game Hens
I just counted the points for the hens with skin and only one serving of oil....most of it gets cooked off.
2 Cornish game hens, prepared in a spatchcock fashion
3-4 tablespoons tandoori spice mix
1/4 cup Vegetable oil
Mix the oil and the seasoning together with a whisk and set aside. Depending on the brand it will be
Bright red or a deep rust color.
The Term Spatchcock is an actual cooking technique. It means "poultry or game that is prepared for roasting or grilling by removing the backbone and sternum of the bird and flattening it out before cooking" This explanation comes from Wikipedia and if you go to the sight and drill down, you will see the "how to" pictures in case you are interested in more detail.
Because these are little birds and easily pliable, I remove the backbone and "crack the sternum, But I don't remove the sternum. So technically this isn't a COMPLETELY spatchcocked hen.
First remove any parts or bags of "stuff" in the cavity. Wash/clean the hens. Pat them dry, inside and out. Turn the bird breast side down.
Then with kitchen shears or a VERY sharp knife cut out the back bone. I used shears only, but do what is comfortable.
I was by myself and I couldn't continue to work and take pictures with my chicken smeared hands...so I have to explain the rest.
Open the bird and put your index fingers under the breast bone with your thumb on top of the breast bone and push with your thumbs until it sort of cracks. The hen will now lay flat.
Repeat with the other hen:
Smear the spice oil all over the game hens -especially on the underside of the bird. Add some salt and pepper.
Cover loosely with plastic wrap and refrigerate for about an hour or more.
Put on a very hot BBQ grill, underside down first, and then turn. Cook until the inner temp is 170 degrees or the juices run clear and the legs is easily movable. (I prefer a thermometer) Remove from the grill to a plate and let sit for about 5 minutes.
Serve with your desired side dishes. I made basmati rice, Indian veggies and naan from a frozen package.
The result? A nicely crisp hen that is tender and delicious. Very Indian tasting without too much work, giving us that familiar Tandoori spice we all love. This was a winner. It's a recipe I will make often this summer PLUS I know the Hubster will not leave me over this dish! Yours wont either.
From my home to yours, ENJOY!
Wednesday, June 22, 2011
Creamy Thai Chicken Salad
I love it when my husband helps me out. That's really a dumb statement. He helps me ALL THE TIME with LOTS of stuff. BUT I love it when he helps me come up with a recipe. I don't often ask for that kind of help, but he has a great palette and he really thinks out of the box.
Left over rotisserie chicken was sitting in the fridge just BEGGING to be made into the next spunky new chicken salad!!! (yes, it did speak to me...what of it???). I was in the mood for Indian / middle eastern or Asian flavors. Tom helped me to decide on Asian - Thai Chicken Salad it would be!
The sauce was a culmination of my basic knowledge of some of the Thai flavors and Tom's "extras". He was a great taste tester, he added lots of flavor with his additions, he wrote down everything I was throwing in the salad and he snapped the photos. AHHH! SO NICE and MUCH quicker!!
The flavor of this salad is spicy, snappy, bright and creamy all at the same time. We put it in a tortilla (cause that's all I had) but you can use Lavash bread, pita's, regular bread, fresh spring roll wrappers, or top a green salad!! Any way you eat it you will find it filling and it will satisfy that need to the favor of Thai when you get a craving!
Thai Chicken Salad
Left over rotisserie chicken was sitting in the fridge just BEGGING to be made into the next spunky new chicken salad!!! (yes, it did speak to me...what of it???). I was in the mood for Indian / middle eastern or Asian flavors. Tom helped me to decide on Asian - Thai Chicken Salad it would be!
The sauce was a culmination of my basic knowledge of some of the Thai flavors and Tom's "extras". He was a great taste tester, he added lots of flavor with his additions, he wrote down everything I was throwing in the salad and he snapped the photos. AHHH! SO NICE and MUCH quicker!!
The flavor of this salad is spicy, snappy, bright and creamy all at the same time. We put it in a tortilla (cause that's all I had) but you can use Lavash bread, pita's, regular bread, fresh spring roll wrappers, or top a green salad!! Any way you eat it you will find it filling and it will satisfy that need to the favor of Thai when you get a craving!
Thai Chicken Salad
1 Cup Chopped Chicken (I used one breast and one thigh)
1 carrot, grated
1/2 red bell pepper, diced
2 tablespoons green onions, thinly sliced
1 tablespoon cilantro, chopped (or more to taste)
1/2 teaspoon Thai basil (OPTIONAL - you wont find this anywhere but the Asian market - leave it out if you don't have it)
Sauce
1/4 cup Best foods LOW FAT (the green one) mayo
jucie of 1/2 lime and it's zest
1 teaspoon peanut butter (I used low fat)
1 teaspoon chili garlic paste
2 teaspoons soy sauce
1/2 teaspoon minced garlic
1 teaspoon mined ginger
1 teaspoon fresh lemon grass (thinly sliced and finely minced)
- NOTE ** If you cant find Fresh. use the lemon grass in the tube OR you can find it in jars - fresh is inexpensive and available just about everywhere. Freeze it and use it whenever you need it - its easier to chop and slice when frozen.
Make the sauce....combine all ingredients and whisk very well until combined - set aside.
In a large bowl add the chicken, carrot, bell pepper, cilantro, green onion and the Thai basil, if using.
Mix in the sauce
You are so totally DONE! Use this how you wish - Wrap it, top it, eat it plain or sandwich it!! We put it into Tortillas, but use your imagination....be creative....but comment and let others know what you did with it, or better yet, send a picture!!
The Result? A Cool, bright, spicy and very Thai tasting twist to chicken salad, perfect for when you need a meal with the zap of cool, refreshing, flavor!
From my home to yours, Enjoy!
Tuesday, June 21, 2011
Grilled Fruit with Maple Lemon Reduction.
Sunday morning is my Weight Watcher weigh in day....and yes, LIKE ALWAYS, I stayed the same. BUT, on Saturday I went with Steph to pick up her Wedding dress...SO MUCH FUN and it's SOOOO GORGEOUS and she looked AMAZING! Surprisingly I found a stunning dress (navy chiffon) and ordered it. OH...and did I mention ITS 3 SIZES SMALLER than what I was wearing in January? WOOO HOOO! I am finally seeing my hard work and efforts finally paying off . TAKE THAT YOU STINKIN PLATEAU!!
At the meeting they were talking about this SUPER healthy breakfast "Pancake". The accolades for this "pancake" were pretty high. The words "GOOD and possibly DELICIOUS" were used. The recipe is 1/2 cup quick oats, 3 egg whites, 1/2 mashed banana, and cinnamon. Now I thought...hmmm, how could this be good, let alone delicious?? I thought, I gotta try this. OMG! It was SOOOO FRIGGEN BAD (should have stuck to my initial instincts because I am literally damaged for LIFE now!) The texture was very off putting, it tasted like soggy oatmeal (only EGG flavored) and even though I used a literally BLACK banana, the flavor didn't come through because the egg flavor overpowered it. It was probably the single most disgusting thing I have ever made! Two bites and it went in the trash (I know...what an idiot! Why two bites - Why didn't I stop at ONE??) I couldn't get the taste out of my mouth for what seemed like hours. I don't care how "filling" it is or how low in points.....its just HIDEOUS!
This blog is about healthy eating, but without giving up taste and texture. WHY do people feel that eating healthy means leaving out all of the emotional pleasantness that is the very essence of how we enjoy food? I wish there wasn't an emotional connection but there is. Denying the connection exists, is just a recipe for disaster. Our brains decide when and what we want to eat and how satisfied we will be when we eat it. Therefore it's imperative we eat good, emotional pleasing food that makes us feel satisfied and happy with our healthy choices.
Enough said.
The recipe I am offering today was a hit at our Fathers day BBQ. I wanted to serve fruit...but I am just a bit bored with sliced melons all the time. I have two peach trees that are perfectly ripe right now and I had an idea from the WW weekly regarding grilling them.
I was however, slightly disappointed I couldn't make the Johnson family baked beans this year. Just too many calories. We love them, they are tradition and BBQ's just don't feel the same without them. Sweet and thick with Molasses and bacon....but I abstained and my back side is better off for it, I am sure!! But I still wanted a light, sweet component to dinner that was emotionally satisfying. So I picked some peaches and grabbed the two mango's I had on the counter and thought Hmmm...the maple reduction with Lemon (from a Thanksgiving sweet potato recipe) would be the PERFECT drizzle sauce for the fruit.....and I am pleased to say, IT WAS!
You can leave the peels on and grill the peach halves and mango halves cut side down and then drizzle. But I decided to peel and slice the fruit, grill it and then drizzle. Either way this was a good AND delicious AND emotionally satisfying dish you are sure to enjoy!
Grilled Fruit with Maple Lemon Reduction Sauce
1 tablespoons of sauce is 2 points - the recipe should make 12 servings or so depending on the amount of reducing you do - Fruit is free
1 cup 100 percent REAL maple syrup
Zest of one lemon
Juice of one lemon
Peaches, Nectarines, Mangoes, Pineapple, apples, etc.....
(I used about 6 small peaches and two mangoes peeled and sliced thick - served 4-6)
For the maple reduction:
( Sorry, I didnt get a lot of pics of making the sauce )
In a heavy pan (minimum size - 2 quart pan required) over medium to low heat add the maple syrup. You will want to bring the syrup to a boil. WATCH IT CLOSE. If the fire is too hot, the syrup will bubble up and over the pan, best to keep the heat on the lower side. Boil until syrup is reduced by 1/3 or 1/2. Remove from heat.
Using a wire whisk, stir in the lemon juice and Zest and whisk until combined and most bubbles are removed. ** Be careful. It might bubble up when you add the lemon juice, just keep whisking.
Taste (carefully, it's HOT) and see if it's sweet yet very tangy. Set aside to cool in a dish you will serve in. Its yummy - be careful you don't DRINK it all! I always want to. You can make this a day or two before and store in the fridge for ease of entertaining...just microwave to take the chill out when ready to use.
Preheat the grill and get it hot. Prepare the fruit for grilling, either by halving it, or peel it and slice it thickly.
Preheat a grilling pan on your BBQ. Add fruit and grill until there is some char marks.
Remove to serving plate and top with sauce and serve OR divide into serving dishes and top each one with a measured amount of sauce.
The result? An easy, delicious, and elegant side dish that meets all of our criteria; healthy, emotionally satisfying, visually attractive. The taste is a bit "sweet with a tang" but wonderful and refreshing! In the end, I didnt miss the baked beans. I felt great knowing I didnt "cave" and make them after all!!
BTW- You WILL have left over sauce. Use it to top baked sweet potatoes, use over grapefruit, or saute with bananas or pineapples for a quick "dessert".
From my home to yours, ENJOY!
At the meeting they were talking about this SUPER healthy breakfast "Pancake". The accolades for this "pancake" were pretty high. The words "GOOD and possibly DELICIOUS" were used. The recipe is 1/2 cup quick oats, 3 egg whites, 1/2 mashed banana, and cinnamon. Now I thought...hmmm, how could this be good, let alone delicious?? I thought, I gotta try this. OMG! It was SOOOO FRIGGEN BAD (should have stuck to my initial instincts because I am literally damaged for LIFE now!) The texture was very off putting, it tasted like soggy oatmeal (only EGG flavored) and even though I used a literally BLACK banana, the flavor didn't come through because the egg flavor overpowered it. It was probably the single most disgusting thing I have ever made! Two bites and it went in the trash (I know...what an idiot! Why two bites - Why didn't I stop at ONE??) I couldn't get the taste out of my mouth for what seemed like hours. I don't care how "filling" it is or how low in points.....its just HIDEOUS!
This blog is about healthy eating, but without giving up taste and texture. WHY do people feel that eating healthy means leaving out all of the emotional pleasantness that is the very essence of how we enjoy food? I wish there wasn't an emotional connection but there is. Denying the connection exists, is just a recipe for disaster. Our brains decide when and what we want to eat and how satisfied we will be when we eat it. Therefore it's imperative we eat good, emotional pleasing food that makes us feel satisfied and happy with our healthy choices.
Enough said.
The recipe I am offering today was a hit at our Fathers day BBQ. I wanted to serve fruit...but I am just a bit bored with sliced melons all the time. I have two peach trees that are perfectly ripe right now and I had an idea from the WW weekly regarding grilling them.
I was however, slightly disappointed I couldn't make the Johnson family baked beans this year. Just too many calories. We love them, they are tradition and BBQ's just don't feel the same without them. Sweet and thick with Molasses and bacon....but I abstained and my back side is better off for it, I am sure!! But I still wanted a light, sweet component to dinner that was emotionally satisfying. So I picked some peaches and grabbed the two mango's I had on the counter and thought Hmmm...the maple reduction with Lemon (from a Thanksgiving sweet potato recipe) would be the PERFECT drizzle sauce for the fruit.....and I am pleased to say, IT WAS!
You can leave the peels on and grill the peach halves and mango halves cut side down and then drizzle. But I decided to peel and slice the fruit, grill it and then drizzle. Either way this was a good AND delicious AND emotionally satisfying dish you are sure to enjoy!
Grilled Fruit with Maple Lemon Reduction Sauce
1 tablespoons of sauce is 2 points - the recipe should make 12 servings or so depending on the amount of reducing you do - Fruit is free
1 cup 100 percent REAL maple syrup
Zest of one lemon
Juice of one lemon
Peaches, Nectarines, Mangoes, Pineapple, apples, etc.....
(I used about 6 small peaches and two mangoes peeled and sliced thick - served 4-6)
For the maple reduction:
( Sorry, I didnt get a lot of pics of making the sauce )
In a heavy pan (minimum size - 2 quart pan required) over medium to low heat add the maple syrup. You will want to bring the syrup to a boil. WATCH IT CLOSE. If the fire is too hot, the syrup will bubble up and over the pan, best to keep the heat on the lower side. Boil until syrup is reduced by 1/3 or 1/2. Remove from heat.
Using a wire whisk, stir in the lemon juice and Zest and whisk until combined and most bubbles are removed. ** Be careful. It might bubble up when you add the lemon juice, just keep whisking.
Taste (carefully, it's HOT) and see if it's sweet yet very tangy. Set aside to cool in a dish you will serve in. Its yummy - be careful you don't DRINK it all! I always want to. You can make this a day or two before and store in the fridge for ease of entertaining...just microwave to take the chill out when ready to use.
Preheat the grill and get it hot. Prepare the fruit for grilling, either by halving it, or peel it and slice it thickly.
Preheat a grilling pan on your BBQ. Add fruit and grill until there is some char marks.
Remove to serving plate and top with sauce and serve OR divide into serving dishes and top each one with a measured amount of sauce.
The result? An easy, delicious, and elegant side dish that meets all of our criteria; healthy, emotionally satisfying, visually attractive. The taste is a bit "sweet with a tang" but wonderful and refreshing! In the end, I didnt miss the baked beans. I felt great knowing I didnt "cave" and make them after all!!
BTW- You WILL have left over sauce. Use it to top baked sweet potatoes, use over grapefruit, or saute with bananas or pineapples for a quick "dessert".
From my home to yours, ENJOY!
Friday, June 17, 2011
Spicy Sichuan Noodles
I have increased my exercise so much, I have been too exhausted to cook. Imagine that.....it almost seems unbelievable. (I am NOT however too tired to eat..LOL) Combine that with the fact that I STILL cannot get over my "cooking performance anxiety" from last week, and what do we have? A serious LACK OF CREATIVITY.
About my exercise. I am trying to run 4 (you heard me) 5K's on my treadmill each week with weight training, fitness ball work and cycling. This week I ran BACK TO BACK 5K's (my first time since I set this goal) !! I did it, but almost DIED the second day. But I do feel like I am FINALLY scratching and clawing my way out of that depressed, out of shape blob I have been over the last few years.
Because of this increase in exercise, I am HUNGRY all the time. So lunch time (2 hours before the run) needs to be light and healthy, but have enough protein and carbs to see me through the exercise. I NEED a balanced, low fat, and healthy lunch but I WANTED a tasty, filling, flavorful and satisfying lunch at the same time.
A couple of days ago, I was on a VERY LONG conference call and I WAS HUNGRY. All I had to do was listen and not say much so I muted my phone, went into the kitchen and made this recipe. I did it so fast, I rushed the pictures, but Cest la Vie. Can you picture me? Head set on...listening, all the while furiously making this dish AND taking pictures! And once and a while I would take the mute off and say "ah huh" - put the mute back on and continue.
NOW THAT'S MULTI-TASKING right there ladies and gentleman!
I ate half for lunch that day and half the next . I can tell you it was good both days with no real benefit to letting it sit the second day, other than it was super cold...which was refreshing!
Spicy Sichuan Noodles
2 servings, each serving 8 points
boil until desired doneness. Drain and cool with cold water…..set aside
The result? A FAST, EASY lunch, dinner or anytime, that will give you a good balance of veggies, carbs and protein. Since it's a dish meant to serve cold, it's perfect for our hot summers! I'[ll be making this (and variations of it) a lot!
From my home to yours, ENJOY!
About my exercise. I am trying to run 4 (you heard me) 5K's on my treadmill each week with weight training, fitness ball work and cycling. This week I ran BACK TO BACK 5K's (my first time since I set this goal) !! I did it, but almost DIED the second day. But I do feel like I am FINALLY scratching and clawing my way out of that depressed, out of shape blob I have been over the last few years.
Because of this increase in exercise, I am HUNGRY all the time. So lunch time (2 hours before the run) needs to be light and healthy, but have enough protein and carbs to see me through the exercise. I NEED a balanced, low fat, and healthy lunch but I WANTED a tasty, filling, flavorful and satisfying lunch at the same time.
A couple of days ago, I was on a VERY LONG conference call and I WAS HUNGRY. All I had to do was listen and not say much so I muted my phone, went into the kitchen and made this recipe. I did it so fast, I rushed the pictures, but Cest la Vie. Can you picture me? Head set on...listening, all the while furiously making this dish AND taking pictures! And once and a while I would take the mute off and say "ah huh" - put the mute back on and continue.
NOW THAT'S MULTI-TASKING right there ladies and gentleman!
I ate half for lunch that day and half the next . I can tell you it was good both days with no real benefit to letting it sit the second day, other than it was super cold...which was refreshing!
Spicy Sichuan Noodles
2 servings, each serving 8 points
1 6oz can chicken
3 Tablespoon Sichuan, Spicy Noodle Sauce ( I used Lee Kum Kee brand)
3 tablespoons water
1-1/2 cup chopped spinach, fresh (or other veggies like chard, bok choy, cabbage, kale, other greens)
3 OZ uncooked whole wheat spaghetti or Asian pasta (I used regular instead of whole wheat...that's what I had)
1/2 regular cucumber (remove seeds and skin or use 1whole Persian or snacking cucumber so you don't have to) - DICED
1/2 red bell pepper, DICED
A tablespoon or so of Sliced green onions, optional
A bit of fresh chopped cilantro (optional)
Soy sauce, Sesame oil, salt and pepper – all to taste
Gather all ingredients
Measure 3 oz of pasta
boil until desired doneness. Drain and cool with cold water…..set aside
Meanwhile, put spinach into a microwave safe bowl and sprinkle with a bit of water – microwave for 30 seconds until wilted. Set aside
Drain Chicken and add to bowl with wilted spinach. Mix up to break up the chicken.
Add pasta, cucumbers, red peppers and other optional items. Mix the Sichuan sauce and water together and add to the pasta dish. Toss to coat.
TASTE! If you like the taste, enjoy.
I found it needed a TAD bit of soy sauce, Sesame oil and salt and pepper.
The result? A FAST, EASY lunch, dinner or anytime, that will give you a good balance of veggies, carbs and protein. Since it's a dish meant to serve cold, it's perfect for our hot summers! I'[ll be making this (and variations of it) a lot!
From my home to yours, ENJOY!
Saturday, June 11, 2011
Kale Chips....SERIOUSLY???
This week has been amazingly busy and I have to aplogize. I really do mean to post at LEAST 4 times a week, if not everyday. Sometimes family responsibilities and work get in the way....Last week I was sick and this week busy....but I should be on track now.
Before I get into the recipe, I have to say I had the WORST cooking experience ever!! I couldn't cook ANYTHING properly. My Mother was visiting and I wanted to make a really nice dinner. So I made a Beef tenderloin with a port/plum sauce. Now let me explain, I have made this SEVERAL times to perfection. Really I have. BUT this time I ruined the meat...yep, me. First it was severely undercooked and then, I tried to get it cooked and then the tenderloin was ruined. UN-FRIGGEN- BELIEVABLE!!!!!
Let's just chalk it up to "performance Anxiety" and leave it at that. AND NO!!! There doesn't appear to be a little blue pill that can help me. So I am PERMANENTLY damaged from the experience and probably need months of therapy!!
But I digress.
I keep hearing people talk on blogs about Kale Chips. SERIOUSLY??? Who the heck wants a KALE CHIP? But the Weight Watcher community loves them because they are crispy, they are free, they are tasty and they are full of vitamins, minerals and fiber.
I am pretty sure most of you are not running out to purchase and cook kale for meal times on a daily or semi-normal basis - I for one only purchased kale to add beauty to a platter in order to show off other food! I have a perfect record of NOT EATING KALE, and really I never thought about it at all. But so much is coming out about the healthful properties of Kale and why, as part of healthy living, we should put Kale into our diets....Kale is high in vitamin K, vitamin A, vitamin C, manganese and fiber! The medical community says 3 servings of broccoli, cabbage or Kale a week can reduce the risk of breast cancer by up to 73%! Not bad!!
Kale comes from the same family of green vegetables as cabbage, and is jam packed with so many cancer fighting, eye healing, organ protecting, detoxifying, immune supporting, cell building properties that it's silly NOT to add it to you diets. But how? It's kind of tough, super fibrous and a little "odd" tasting right?
Well, leave it to people to find a way to make things appetizing. ALL OVER THE INTERNET you will find Kale Chip recipes. Crispy little delicate morsels that really do taste good and are a bit addicting. The best part? You are putting something really healthy into your body.
These satisfy the craving for snacking on something crispy and salty.
Even though you will feel crazy, please try them....for your health!
KALE CHIPS
WW PP - O (nice huh?)
2 bunches, Kale
Pam or some other spray oil
salt and pepper
Preheat the oven to 350 degrees.
If you are going to rinse the Kale...do so, but then it has be dried completely before you work with it.
To prepare the Kale, cut the leaves off that horrible stem...(very tough and very fibrous).....the stems should be disposed of. Cut or tear leaves into 3" pieces or so. I try to make the sizes as uniform as possible...but it really doesn't matter.
Line a baking sheet with foil and lay the kale in a single layer. Do not stack Kale. If you have too much for your pan, use another pan or wait till the first batch is done.
Spray the Kale with Pam or other oil mist/spray until coated (be careful not to over do the spray) add salt and pepper to the kale - not too much and pop it in the oven.
I bake them in 3 minute intervals. Bake Three minutes and check them with your fingers. The first three minutes they will feel kind of just soft. The second three the edges will start to crisp. If the smaller pieces are crisped, take them out and keep baking the balance:
After 6 minutes, I start watching them every minute and remove those that are done until the whole try is crisped. They will crisp fast at the end so watch carefully. Lots of people say they taste bitter when browned, but I find I like the browned ones! LOL
When done you have a nice bowl of crisped greens!
The result? Healthy, crispy, beautiful little "chips" that you should be encouraged to pop in your mouth as quick as you can!! When you are done "binging" on the kale chips., take pride in knowing you just did something really good for your body!
From my home to yours, ENJOY!!
Before I get into the recipe, I have to say I had the WORST cooking experience ever!! I couldn't cook ANYTHING properly. My Mother was visiting and I wanted to make a really nice dinner. So I made a Beef tenderloin with a port/plum sauce. Now let me explain, I have made this SEVERAL times to perfection. Really I have. BUT this time I ruined the meat...yep, me. First it was severely undercooked and then, I tried to get it cooked and then the tenderloin was ruined. UN-FRIGGEN- BELIEVABLE!!!!!
Let's just chalk it up to "performance Anxiety" and leave it at that. AND NO!!! There doesn't appear to be a little blue pill that can help me. So I am PERMANENTLY damaged from the experience and probably need months of therapy!!
But I digress.
I keep hearing people talk on blogs about Kale Chips. SERIOUSLY??? Who the heck wants a KALE CHIP? But the Weight Watcher community loves them because they are crispy, they are free, they are tasty and they are full of vitamins, minerals and fiber.
I am pretty sure most of you are not running out to purchase and cook kale for meal times on a daily or semi-normal basis - I for one only purchased kale to add beauty to a platter in order to show off other food! I have a perfect record of NOT EATING KALE, and really I never thought about it at all. But so much is coming out about the healthful properties of Kale and why, as part of healthy living, we should put Kale into our diets....Kale is high in vitamin K, vitamin A, vitamin C, manganese and fiber! The medical community says 3 servings of broccoli, cabbage or Kale a week can reduce the risk of breast cancer by up to 73%! Not bad!!
Kale comes from the same family of green vegetables as cabbage, and is jam packed with so many cancer fighting, eye healing, organ protecting, detoxifying, immune supporting, cell building properties that it's silly NOT to add it to you diets. But how? It's kind of tough, super fibrous and a little "odd" tasting right?
Well, leave it to people to find a way to make things appetizing. ALL OVER THE INTERNET you will find Kale Chip recipes. Crispy little delicate morsels that really do taste good and are a bit addicting. The best part? You are putting something really healthy into your body.
These satisfy the craving for snacking on something crispy and salty.
Even though you will feel crazy, please try them....for your health!
KALE CHIPS
WW PP - O (nice huh?)
2 bunches, Kale
Pam or some other spray oil
salt and pepper
Preheat the oven to 350 degrees.
If you are going to rinse the Kale...do so, but then it has be dried completely before you work with it.
To prepare the Kale, cut the leaves off that horrible stem...(very tough and very fibrous).....the stems should be disposed of. Cut or tear leaves into 3" pieces or so. I try to make the sizes as uniform as possible...but it really doesn't matter.
Line a baking sheet with foil and lay the kale in a single layer. Do not stack Kale. If you have too much for your pan, use another pan or wait till the first batch is done.
Spray the Kale with Pam or other oil mist/spray until coated (be careful not to over do the spray) add salt and pepper to the kale - not too much and pop it in the oven.
I bake them in 3 minute intervals. Bake Three minutes and check them with your fingers. The first three minutes they will feel kind of just soft. The second three the edges will start to crisp. If the smaller pieces are crisped, take them out and keep baking the balance:
After 6 minutes, I start watching them every minute and remove those that are done until the whole try is crisped. They will crisp fast at the end so watch carefully. Lots of people say they taste bitter when browned, but I find I like the browned ones! LOL
When done you have a nice bowl of crisped greens!
The result? Healthy, crispy, beautiful little "chips" that you should be encouraged to pop in your mouth as quick as you can!! When you are done "binging" on the kale chips., take pride in knowing you just did something really good for your body!
From my home to yours, ENJOY!!
Subscribe to:
Posts (Atom)