I hope everyone had a great Memorial Day Weekend! I was off for 4 days (first 4 days in a row since starting my new job!!). I want to give a big shout out to my Son-in-Law, Patrick who is serving in the ARMY! Thanks for everything you do for our country!
If you've been reading the blog for a while, you have read I am on a weight loss plateau. I don't know what else to call it as I have been trading the same two pounds back and forth for 2 months! UGGHHH. So frustrating!! For a while, I felt like giving up and yes, I cried each week. Poor Steph who goes with me and has to listen to me WHINE my butt off about it. But I have lost inches, I do feel better and I am working out 6 days a week....OH! and get this! I am JOGGING now (OK don't laugh) but it's true. I just jogged 2.5 miles yesterday morning STRAIGHT without stopping. I felt so good! I NEVER thought I would say that. I would have ran the entire 5K (3.1 miles) but My foot was killing me (YEP, I am going to the running store today to figure that out) but I did it! 2.5 miles! What an accomplishment. SOOOO, I know good things are happening to my body and I have decided to STICK IT OUT with Weight Watchers for a bit longer. The alternative is not much better!
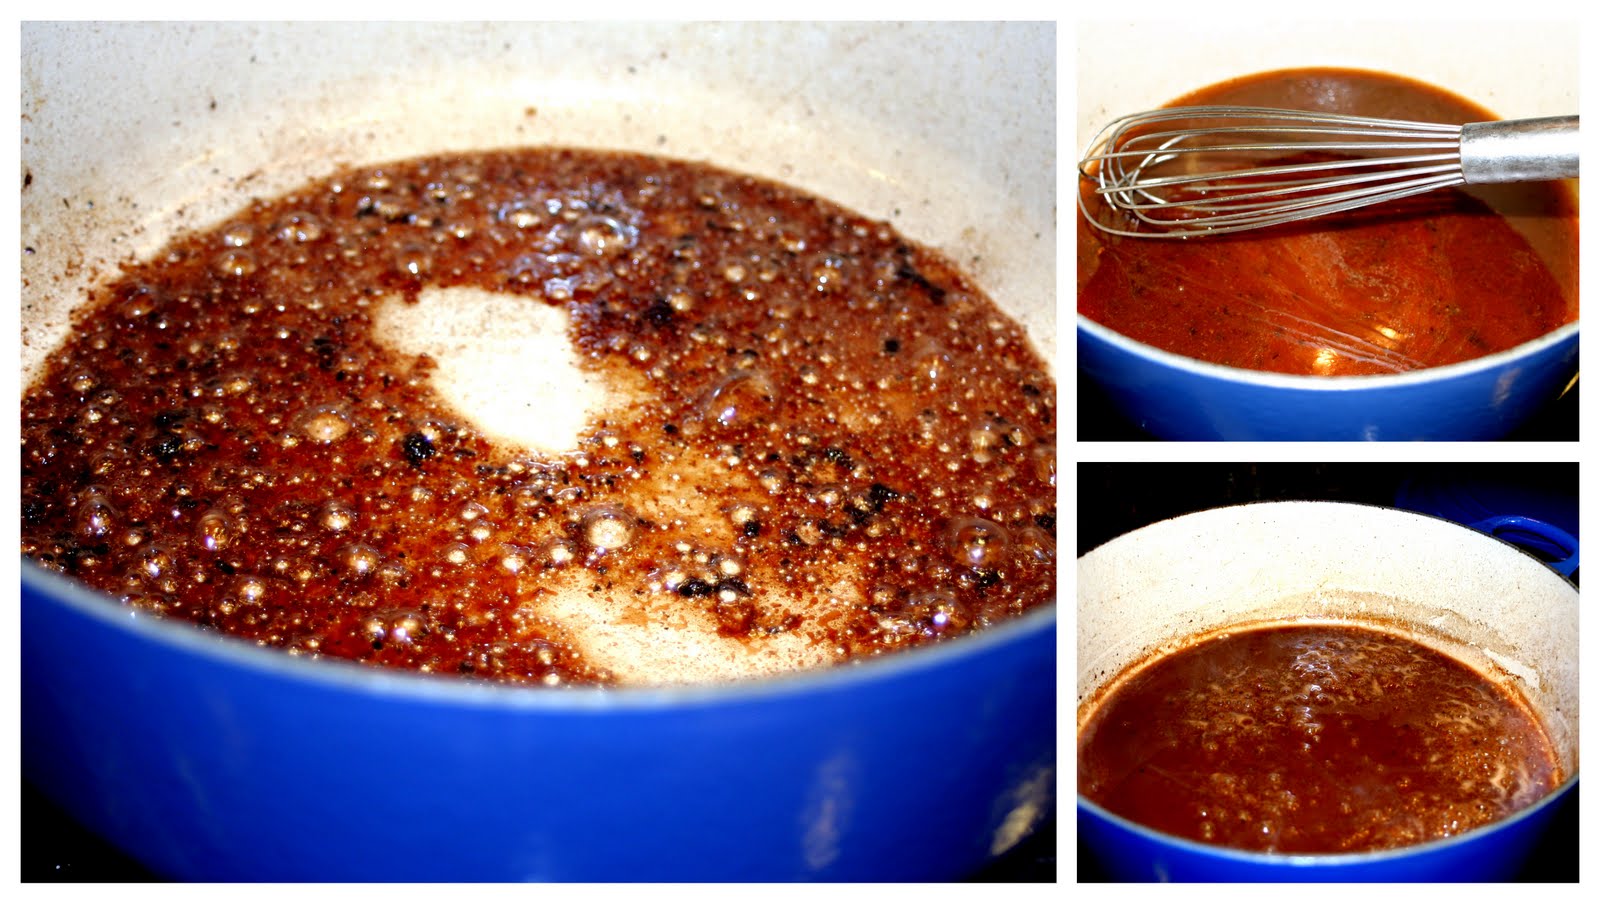
I lost my pictures as I told you on the Onion Balsamic Glaze. The pictures of this salad were with those. I am so frustrated., but again, it's so good I didn't want to hold up the recipe.
I have a list of blogs that I like to read, you can see those on the right side of this posting. One of those blogs, is WWW.SKINNYTASTE.COM. Her name is Gina and she works hard to provide healthy and Points friendly recipes! Plus her photos are AMAZING. I usually make and post my own recipes, but once in a while, something in hers looks so good I must try it.
She recently posted a recipe call Vietnamese Shaking Beef Salad (Bo Luc Lac). It looked amazing, healthy and refreshing, I made it and it was just that. I tweaked he salad portion of the recipe (just a bit) but the dish was pretty true to recipe. If you want to see the original recipe and her awesome photos, please visit her blog and check out some of the other awesome recipes she has.
The changes I made were to use Skirt steak instead of top Sirloin (yes, a bit higher points) I think for quick cooking and marinating skirt steak is tender, tastes great and cooks fast. It's much thinner which I like, so you feel like you get more meat. I have to trick myself like that! Also, instead of salad greens or arugula I used lightly sauteed spinach. It just suited the meat better, I thought. The meat should marinate overnight or for a least a few hours. I let it marinate overnight which I feel was worth it. There is also this SUPER salty and limey "dipping sauce" which I thought was not worth making. It did nothing for the meat and was so salty and potent, it was distracting.
See what you think:
Shaking beef Steak Salad
WW PP 9 pts if using skirt steak, less with other cuts
This recipe will serve 4 - make sure you have a TON of spinach when making
Steak Marinade:
1-1/2 pounds of skirt steak (Her recipe calls out for top sirloin - use either)
6 cloves garlic, minced (or equivalent out of jar)
1 Tablespoon sugar
1 Tablespoon oyster sauce
1 tablespoon fish sauce
1 teaspoon sesame oil
1 tsp of what's called THICK or BLACK soy (This is VERY special soy and it's not available in the average grocery store, if you don't have it, call me for some or use regular SOY)
Salad Vinaigrette:
1/2 cup seasoned rice vinegar
1-1/2 tablespoons sugar
1-1/2 teaspoons salt
SALAD:
Fresh baby spinach - I used one of those big plastic tubs it probably has about 8 cups in it.
Red bell, pepper finely, sliced
2 whole Roma tomatoes, sliced
About a 1/3 of a can of water chestnuts, chopped (optional)
Cucumber. sliced thin
Mix the marinade together and add the cubed steak. Put it all in a plastic bag, remove most of the air and put in to refrigerator overnight or for a few hours.
When ready to make salad lightly saute spinach in batches (Don't over saute and really cook the spinach - it will reduce but you want some leaves barely sauteed also) and put onto large platter. Top with sliced tomatoes, cucumber, red-peppers and water chestnuts.
Mix the vinaigrette together and set aside.
If you are going to want white rice, start it now.....(we ate it with some rice)
Heat a saute pan VERY hot. Add a bit of olive oil and put in about a 1/3 of the meat in a single layer- DO NOT CROWD THE PAN...as Julia Child's would say.....heat until VERY darkly browned and start shaking the pan back and forth to turn meat and deeply brown the other side. When done put meat on top of salad and repeat again and again until all meat is done and on the salad.
Top the salad with the vinaigrette and serve with rice on top or on the side.
The result was a SUPER fresh and authentic meat salad that is sweet, tangy and vibrant. I apologize for the lack of pictures, but make the salad, it's worth it!
From my home to yours, ENJOY!

Lite and Tasty recipes from my home to yours!
Tuesday, May 31, 2011
Friday, May 27, 2011
Balsamic Onion Spread
The last couple days have not gone as planned. FRUSTRATING. I planned many more pics for this post but I lost them all. Don't ask. It just happened. So now I have finished product pictures but no pictures of the process. I wasn't going to post, but the spread is just too good not to post it, especially for this weekend.
A few posts ago, we talked about gourmet foods. (see Butternut Squash Pasta Sauce). Those little jars of "goodness " are wonderful but oh so expensive. I don't care how much money you have, sometimes it's just the principle of it. As I have said before, some are worth trying to make on your own and others are not. The pasta sauce was a great example of one that's worth it. This one is another. I buy a Balsamic onion sandwich spread which is great for Panini's, burgers or the "adult" grilled cheese. But that sandwich spread is a whopping 12.00 per jar. I know....and I bought it!! When I run out...I don't buy another one for months because I hate spending that much money.....then I just HAVE to have it and break the bank to get it. After all, it's balsamic and onions...YUMMMMM. It's made by a VERY famous chef whom you would recognize and trust me we pay dearly for his name.
So I looked around for a recipe and found one that seemed similar. It's from a company who makes Pita Snacks - Called Pita break. Their website is http://www.pitabreak.com/. There was a bunch more really great recipes for dips and sauces there as well, you should check it out.
I changed their recipe slightly (what else is new?) until I got the flavor I wanted, which is actually better than the 12.00 jar!! Go figure.
The thing about a sweet oniony balsamic "glaze" is that the sandwich, panini, burger or quesedilla you are creating gets an INCREDIBLE flavor....deep, special and sophisticated. The sauce is DELICIOUS and its relatively EASY to make. All that adds up to being able to have this whenever I want it! I figured it costs about 4.00 to make a qty about 3 times what is in that gourmet jar.
For Memorial day weekend, if you make one thing, make this spread for your burgers and then slather it on EVERYTHING else after that....and when it's GONE? We get to make MORE.....YES!
Balsamic Onion Spread
This recipe makes 1-3/4 cups which is about 14 servings of 2 tablespoons each - 2 WW PP from the recipe builder.

1/4 cup Olive Oil
4 large onions ( I used Texas sweets, but you can use plain, red, etc...)
6-8 garlic cloves, Sliced fairly thin
4-5 tablespoons balsamic vinegar
3 tablespoons honey
2-1/2 teaspoons salt (and more for the end)
red pepper flakes to taste ( I used about 1/4 teaspoon)
1 Teaspoon Dried Tarragon (or oregano or basil) ( I used the tarragon with GREAT results)
Garlic powder
Pepper
Peel onions cut off both ends and slice in half lengthwise. With cut side down make slices 1/4" to 1/2 " wides making half circles. Set aside
Slice garlic cloves, set aside.
In a large skillet or wide enameled cast iron pot place over high heat and add oil. Wait until the oil is "shimmering" and add onions and garlic. Stir all the onions until they are coated with oil and let cook for a few minutes. Then Stir. Continue cooking and stirring, caramelizing the onions and garlic to a deep brown color.
While onions are cooking combine the 4 tablespoons of the balsamic and only 2 tablespoons honey along with salt, Tarragon (or other herb) and the red pepper flakes.
When onions are deeply colored, reduce heat to medium and add the vinegar mixture, deglazing pan and scraping up any bits. Continue cooking for 15 to 20 minutes, until the onions are soft and the liquid is reduced. TASTE it at this point. I felt it needed pepper, garlic powder, another tablespoon of vinegar and honey. You may also want to add more red pepper flakes. I then continued to cook for a few minutes more. **You may not need this depending on your taste....so don't just add it.
Once you obtain the desired flavor, put all ingredients in food processor and pulse to desired chunky texture. I counted 6 pulses on my food processor.
I put the onion spread into a mason preserve jar. Store in refrigerator.

The result? A truly gourmet culinary experience....The spread is exciting, rich and deeply flavored, making ANYTHING it touches come alive.
From my home to yours, ENJOY!
Tuesday, May 24, 2011
Rack of Lamb with Pan gravy

You know those days when your significant other is just in a BAD MOOD??? That never happens right? Well, I probably have one of the best husbands, BUT when he is in a bad mood....OH BOY! The world (and I do mean the whole world!) is NOT a happy place. YIKES!!! (yes honey, that be you!) I know you're thinking "Shelley, Just what did you do to upset him?" and guess what?? It wasn't me this time...!! There is a first for everything!
As you may have noticed, there was no blog post yesterday....why? Because someone was a bad and sad camper and cooking was out of the question. So I when the going gets tough....the tough go grocery shopping! (Ummmm yeah...Like I needed more STUFF) but I did get fabulous produce and a few other fantastic things. And it didn't hurt to be away from home for a couple hours!!
But by today, I was done with the grumpster. I decided I could engage in a war....which I would not have won (well...maybe) OR I could cook a fantastic meal and see if I could SQUEAK out a better outlook!
I found a rack of lamb in the freezer....I LOVE LAMB (see Easter post for Leg of Lamb, for another lamb dish- under April archives) and Rack of lamb is fantastic, easy and cooks quickly (and you thought you couldn't have rack of lamb on the weeknights). I paired it with a killer gravy, a glass of Pinot Noir (cause wine couldn't hurt in easing the bad mood right?), roasted onions with potatoes and lemon roasted asparagus (see asparagus post in April archives)
That should get ANYONE out of a funk and into a food frenzy! It worked. Boy did it work.! If you know the hubster, he is not a foodie. He prides himself on NOT being a foodie....and insists that food is just a means to survival. Ummm. RIGHT. He has claimed that for 28 and a half years. But tonight through dinner he thought the gravy was so good that it was BETTER than the rack of lamb, which he loved...But he said he would have been happy with Potatoes, gravy and asparagus!! When he started drinking the gravy off the LADLE he said "I am ashamed!" - then he licked his plate....LOL THAT NEVER HAPPENS! (yeah...got the pic)

He is in a good mood, my weapon worked and he has exclaimed he is now a "foodie" - AWWW, Sweet success!
I hope you enjoy it as much as he did.
Rack of lamb with Pan Gravy
WW points/ Calories dependant on Quantity (we ate about 6 oz each)
1 Rack of Lamb (mine was in two 4 bone pieces), trimmed of excess fat
2 tablespoons (or so) fresh rosemary, chopped fine
2 tablespoons (or so) fresh thyme, chopped fine
1 tablespoon mince garlic (I used jarred....I know, but it's a weeknight)
salt and pepper....about a half teaspoon each
Pinot Noir to drink....and to use for gravy - If you are not going to drink it...use some port or other red you have...just make sure it's a good wine! and let's say it together...NO COOKING WINE FROM THE VINEGAR AISLE!
Gravy
Pan Drippings
Wine (preferably Pinot Noir)
1-1/2 cups beef broth, strong (use "better than bullion - Beef" I beg you)
1-1/2 tablespoons flour
a few tablespoons cold water
Dried thyme
Preheat your oven to 425 Degrees (if you have convection, use it)
If you are roasting potatoes, get them in the oven now.
Make paste: Add rosemary, thyme garlic, salt and pepper and a bit of olive oil (about a tablespoon) and mash together. I used a mortar and pestle:

Rinse, Dry and salt and pepper the rack (s)
In an oven proof pot or skillet, heat dry pan until very hot. Add a couple tablespoons of olive oil. When oil is shimmering add the rack thick side down. Sear until there is a great brown crust. Turn over and sear the other side, then sear the sides of the rack.

Turn off heat, put in a probe thermometer and coat the rack(s) with the herb mixture. I use strips of foil to cover the bones so they don't burn (it's not a good look) but it's up to you.

Put into the hot oven and roast until the thermometer reads about 145 degrees (it will rise at least 10 degrees upon resting) for medium - and 5-10 degrees more for a bit more well....This only takes about 20 minutes so get your asparagus prepared and stir your potatoes (if roasting).
Remove the rack from the oven when desired temperature is reached. Remove the racks to another plate or platter and let rest. This picture shows all the steps, but DON'T carve until table side ready to eat.

FOR GRAVY
Put the pot on top of the stove...there will be some fat and burnt bits.....get pot a bit hotter on stove top and add wine. I would tell you the quantity, but I didn't measure. JUST pour (I would bet it's about a half a but to 2/3 cup) - Now the wine will bubble - scrape up any bits, burned stuff, etc.....and cook the wine a bit. If it looks like it's evaporating too fast, add more wine. Then add the beef broth and bring to a boil again. Mix the flour with the cold water until a smooth paste forms. Add four to pan whisking constantly. TASTE. You may need more wine, salt, pepper and I added a bit of dried thyme (crush it between fingers to release the flavor). Continue to stir until thick.
Carve table side and serve with gravy and other side dishes.
The result? A tender, flavorful rack of lamb with an easy but delicious gravy. Unfortunately, you may need to save a lot of calories/points for dinner because portion control will go out the window ( yeah...I blew it ). The dish is worth it. Save this as the token offering for a that grumpy person in your life....it works!..
From my home to yours, Enjoy
Monday, May 23, 2011
Lemon Roasted Chicken
On Sunday's (or any day) there something about a roasted chicken that just screams of home. It conjours up memories of the "old days" and reminds some of us of parents, grandparents or special meals. It also reminds is of slower, easier times. I call that the "Mayberry effect". I just KNOW in my heart of hearts that Andy Griffith had a roasted chicken or pot roast EVERY Sunday night made lovingly by Aunt Bea......!! (you know you think the same thing!!)
The smell of it baking is inviting and comforting. Somehow a roasted chicken just seems special doesn't it? Even though we can bake chicken pieces, saute skinless breasts, BBQ it, slice it, dice it and sauce it....It just seems like making a whole chicken is a far bigger deal than it really is.
I like to wait till chickens are on sale...then I buy 2 or 3 and freeze them. I use them for Roasting (like in this recipe) or boiling (think soup, chicken and dumplings, shredded chicken with the benefit of homemade stock!)
The recipe for Roasted lemon chicken is sometimes referred to as Engagement chicken. Look it up on the Internet....there are a million recipes...all very similar. The story goes that if you make this chicken for your boyfriend, it's so good that you should expect a proposal of marriage.......My husband said...he liked it so much he would marry me again!
This recipe has a lot of lemons. It seems like too much. DON'T SECOND GUESS IT. The lemon is NOT overpowering, even though you'd think it would be.
This is perfect for anytime, but I love it on Sunday's.
Lemon Roasted Chicken
Points/calories are dependant on whether you eat white or dark meat, skin or no skin...and quantity

1 whole chicken (3-5 lbs)
5 to 6 Fresh lemons
1 whole head garlic (cut in half crosswise - so garlic cloves are exposed but head is in tact)
1 bunch fresh thyme
2 large onions chopped in large pcs (quartered or in eighths)
4 large red or white rose potatoes (or use what you have)
Kosher or sea salt and pepper (freshly ground if possible)
For gravy
1/2 cup dry white wine
1/2 cup chicken stock
1 tablespoon all purpose flour
salt and pepper
Fresh lemon juice
Thyme from the roasted chicken
Olive oil
Remove and discard the chicken liver, giblets and anything else in the chicken - rinse well and pat dry with paper towels inside and out.
If you have time, heavily salt and pepper inside the cavity and out and set on a platter....wrap in plastic wrap and set in refrigerator for several hours or overnight. When ready to bake, take chicken out, rinse and dry again.
Preheat oven to 400 degrees
Using a citrus squeezer, squeeze the juice of 2 of the lemons inside cavity and out. Liberally salt and pepper chicken inside and out.
Place garlic head, 1 lemon - quartered, and the thyme inside of the cavity. Tie up the chicken legs with kitchen string and tuck the wing tips under the body. Place chicken in a 9X13 pan.

Now cut up potatoes, onions and place in bowl. Mix potatoes with kosher salt, pepper and about a tablespoon of olive oil. Cut last lemon in 8 wedges and mix in with potatoes.

Place potatoes all around the chicken:

When done, It should look like this:

Pop chicken in hot oven with a probe meat thermometer. If you have a 6th lemon, you can baste the chicken with lemon juice during baking. The temperature should be 180 degrees before you remove chicken from the oven. When chicken is done remove potatoes and onions to serving bowl and put chicken on a platter cut string and CAREFULLY remove thyme and garlic for gravy. Let it rest for 10 minutes (leave in thermometer) - you will see temperature rise about 5 degrees or more.
While chicken is resting, make gravy. Put the pan on the stove top and turn heat to medium-high. Add wine and stir up the bottom to scape up the brown bits, boiling the wine a bit. Add the stock and sprinkle on the flour whisking continuously for a minute or more, until sauce thickens. Add salt, pepper, some thyme leaves (from inside of chicken), and a couple of the roasted garlic cloves, mashed up, if desired.
Serve and carve table side:

The result? A beautifully roasted chicken bursting with lemon goodness that is tender, flavorful and comforting. A real Sunday dinner treat.
From my home to yours, ENJOY!
Sunday, May 22, 2011
Polenta and Eggs
Polenta. It evokes different things in different people. Some people have never eaten it. Others think of it as cheap peasant food. Still, others see it as a gourmet delight.
The truth is Polenta is really just cornmeal mush. Yep. That's right. It's not very exciting. Just the word "mush" sounds sad, boring, unappealing.and tasteless, doesn't it? But somehow Polenta is comforting, warm, filling and inexpensive. It's also the EASIEST thing to make for ANYONE who ventures into the kitchen. ANYONE can make good polenta. I promise.
In the grocery store, you can find fine ground cornmeal in the baking section. It's so much less expensive . Alternatively you can buy the stuff in the Italian aisle called Polenta...sometimes it's a bit finer...but it's pricier. (you can get fine Italian polenta in small packages at Valley Produce Market for a great price if you are local to Santa Clarita) Polenta is also available "ready to use" in tubes. You may want to buy the ready made kind for this recipe if you don't want to make it. ME? I would never spend $3.00 to $5.00 on a tube of polenta you can make for about a buck, but that's me and I am cheap like that.
Hereis how to make polenta in an itty-bitty nut shell:
1 cup fine cornmeal (polenta)
1-1/2 cups to 2 cups water
Boil the water.....Add the polenta in a slow stream whisking constantly to avoid lumps (definitely avoid lumps). Continue whisking while it's cooking over med-low heat until it's thick. THAT'S IT.
Now I say "that's it" very tongue and cheek. Seriously......That's BORING, right? But the greatest thing about polenta is its ability to latch onto flavors. Herbs, spices, sauces, CHEESE, vegetables, special oils and vinegars, and the list goes on. Be creative, add all kinds of things, bits of meat and cheese, Sweet peppers and onions, cheese and mushrooms, basil, garlic, pine nuts and cheese (pesto style)......just don't forget to add the most important cooking ingredient - the Salt and Pepper. Serve it soft like mashed potatoes, firm or anywhere in between.
Put any left overs in a sprayed plastic container ( tupperware ) - this is how you "mold" it.
I am excited when I have left over polenta. It makes the best breakfast!
Polenta and Eggs
6 WW/PP (depending on your egg and olive oil qty)

MOLDED Polenta (mine had salt, pepper, sauteed onions and sweet red peppers)
Eggs (depending on how many you will eat and how many peeps your cooking for)
1 whole roma tomato per person - sliced and ROASTED with seasonings (I used zataar seasoning, salt and pepper)
1/2 triangle light laughing cow cheese - mozerella and sun dried tomoato flavor
Fresh basil (if you have it or want to buy it)
Olive oil and white balsamic (or regular balsamic vinegar) I use 1 teaspoon per person of each
Remove the polenta from the Mold. Evenly slice it, and thinkly slice the basil (if using):

Spray your saute pan and one side of the poleta and put it spray side down hot skillet and let them "fry"until pretty browned. Spray the opposite side, turn them over and let the other side get pretty browned. While these are frying, roast your tomatoes. We have discussed roasting tomatoes a lot. Just as before, line a pan with foil. place sliced tomatoes on the foil....season them with salt, pepper and other seasonigs (just salt and pepper are fine) and pop them under a hot broiler. Turn them once if you wish and remove when they are roasted to your liking.
Mix a teaspoon of oil and vinegar together ( I used roasted garlic olive oil and white balsamic - devine!)
When the polenta is done. Remove them to a plate, spread half the triangle of laughing cow on hot polenta ( I know, Im using 1/2! It really doesnt need more but feel free to add it if you want it) - pile the tomatoes on top

Fry your eggs to your liking, lay them on top of the tomatoes and top with fresh basil. Ppour your oil and vinegar around the plate so you can "dip" each bite into it.
The result? A truly decadent and upscale breakfast/brunch that transforms polenta into a gourmet affair. Every bite is perfect and balanced. It's anything BUT peasent food.!
From my home to yours, ENJOY!
Friday, May 20, 2011
Singapore Chili Crab
What a busy week! Work, babysitting, exercising, hair and nail appointments, along with Blogger being "buggy" after a major mal-function with their main frame, all left me with little time to blog. For that I apologize. But let's get to it...this is a long one, BUT SOOOO WORTH IT.
I talk about treating yourself and your family special....it's important. We deserve what our guests have; the best food carefully put together, your best or favorite wine and the time to give that to yourself or your family.
Tonight I was blissfully alone (sorry honey, it was great...but I still love you!! LOL). You might have thought "she should just relax.....pick up dinner instead of making it....take a hot bath...watch a movie, sleep or ANYTHING BESIDES COOKING???" But here is the funny part. I could not wait to get home to cook myself a gorgeous meal!! Yep, that's right....just little 'ol me. Why? Because my favorite food is what I prepare, and my favorite way to relax is in my kitchen making something wonderful, having a glass of wine and listening to my favorite music. Ahhh. The peace of that.....
It helps me realize how good my life really is. How losing weight FAST is not everything. How life's perceived disappointments are really blessings. How much I need to appreciate the things I have accomplished instead of those things I have not.
WOW,. All that from cooking ONE meal? It's truer than true. It's how I stop, be still, listen and pray. It's my love language towards others and myself.
This dish is not just ANY meal. It's THE meal. The one, that if I had to choose, would likely be THE favorite meal I have ever eaten anywhere in the world. And I have been around the world. This meal evokes such pleasant and happy memories. I can LITERALLY feel the endorphins being released at the moment it crosses my mind: Singapore Chili Crab. I remember where I was, what time of day, what the day looked like, who I was with, and that first incredible bite of those wonderfully soft rolls all sopped in the most delectable sauce. It quite possibly was the freshest crab I have ever had the pleasure of eating. Ummm. Did I mention that SAUCE? If I am not mistaken, it's one of Singapore's most famous dishes.
It's darn near impossible to replicate the seafood that SINGAPORE has. It's the best seafood I have ever had, anywhere, period. I have never had crab in the states as good as in Singapore, it pales in comparison.....but unless you have been to Singapore, thankfully you wont know what your are missing.
It doesn't sound that sexy does it? Singapore Chili Crab. Well....not so fast!! Think about this, perfectly cooked crab in a sweet spicy, tomatoey sauce with the PERFECT Asian rolls to SOP it all up. YES....it's "finger food" at it's finest. To me? That's Sexy!
I took this recipe out of my dearest and most treasured ASIAN cookbook. It's called "The Essential Asian Cook book" by whitecap books....it doesn't even have an author's name. It's like those TIME books, I guess. But it's the best "textbook" on Asian cooking I have found. EVER. ** I will try to add it to my store, if it's still in publication. It's an absolute MUST HAVE...period. I think I paid less than 10.00 at a bookstore on sale.
I pass by the recipe in this book all the time and I LONG for it every single time I pass it. I've always wanted to make it...but frankly after eating it in Singapore many times, I was flat out intimidated to make it!! I mean, what if it was bad? What if the feeling wouldn't be the same? What if I failed, or the recipe failed? What if it messed up my vision of what it was like?? I was scared!
But I had bought crab, red Chile's, and what I thought were the perfect "rolls" for this dish a while ago. I stuck them in the freezer. Why? Well for such a time as this! One night....alone in my kitchen to have my Chili Crab, all by myself....after all if It was bad, nobody would have to know....no worse for the wear, right? It would be my little secret.
But it was absolutely perfect. I am so happy to share it with you.
Singapore Chili Crab

(I haven't figured the calories, but they are not high. I will re-post with that info later.
If you have the cook-book...I made changes to the recipe to get the taste I remembered - see below.)
1 pound or more SNOW crabs legs (or whatever crab you like...you really should use Fresh Blue swimmers if you want to be completely authentic) Try not to use frozen crab - use fresh...trust me I used frozenn..Enough said.
Flour (less than a 1/4 cup)
Oil (I used peanut, but Vegetable will be fine)
4 large shallots, finely diced
2 inch piece of fresh ginger, peeled and minced on a ginger grater (see picture) or bottled
6 large cloves of garlic, Minced (I used a huge clove of elephant garlic-probably equal to 6) or bottled
3 Red Chile's, seeds and membranes removed, finely diced
2 cups CHEAP, traditional flavored, canned spaghetti pasta sauce (I know-this is weird.. Go with it)
1 cup water
4 tablespoons soy sauce, or more to taste
2 tablespoons sweet chili sauce
2-3 tablespoons seasoned rice vinegar
3 tablespoons brown sugar (light or dark) To be more authentic, use palm sugar.
Sambal Olek (chili paste/sauce) (I used 2 teaspoons)
Rolls - get sweeter rolls.....preferably from an ASIAN store.....tell them what you are making and they will point you in the right direction! Hawaiian rolls will work though. I bought these ones:

WINE for you to drink- I prefer sweet Riesling for spicy food....my fave: Pacific Rim, Sweet (or dry) Riesling , but sparkling Apple cider will work beautifully too (same sweetness).

Please prep all ingredients BEFORE you start making this.....Don't try to chop and cook...it's a fast recipe once everything is prepped.
First wash and scrub the crab shells and dry....set aside.
Grab your shallots, skin then and dice fine - not sure what a shallot looks like? Check it out:

Then grab your red chili peppers ( I buy them fresh and freeze them...hence the "cold icy look"), Remove seeds, membrane , then dice them fine:

GRATE the ginger on a Ginger grater ( or use bottled ).....(not your regular cheese grater):

Mix your sauce in a large bowl: Add pasta sauce, water, soy sauce, sweet chili sauce, rice vinegar and brown sugar ( or palm sugar). Set aside.
Mince your garlic (if you use elephant garlic....grate it on the ginger grater) - set aside
Set your crab out and dust it with flour.
You should be completely prepped!!

Now - you want heat a large bottomed pot or WOK and add oil (about 2 tablespoons) and "fry the crab just until the shell is pink and the tops are a bit browned. Remove and keep frying until all the all crab is done.

To make sauce - Add shallots, garlic, ginger, red Chile's and saute for 5 minutes.
Add "red" sauce to the pan and boil uncovered under med-low heat for 15 minutes. TASTE. It's at this point I thought I needed the sambal olek (chili sauce). Add it if you need a little more kick.
This picture of of all the steps:

After 15 minutes, add the crab back to pot and cover. Simmer for 5 minutes covered, then uncovered for another 5 minutes, turning crab in sauce.
During this time, make your vegetable of choice and set out your bread (you might want rice as well, )I dont because I have that bread!
Serve crab on plate smothered in sauce:
The result? For me, it was a trip back in time. The sauce was what I remembered and it soothed my soul. For you? Be prepared, you may feel as I did and remember every, blissful and delicious mouthful. Don't be surprised if you feel as if you just bathed in it - You should bathe in it. It's that good.
From my home to yours, ENJOY!
Tuesday, May 17, 2011
Butternut Squash Pasta Sauce

Don't you just love gourmet food items? Fancy preserves, sauces, oils, cheese and the like. There is nothing like buying one fancy (albeit expensive) food item and coming home to make your creation. It makes us (and our families) feel really special.
Here's the problem with that....these products are not usually "light" and they are expensive. Then we fall in love with them and we cant just buy them all the time. Some of those items like the O Olive Oil I love, will always be in my pantry. That's because I cannot replicate the flavor with anything else. Trust me, I've tried making lemon olive oil.....it wasn't a success. Lets be real. Citrus and olives crushed together during production is impossible to replicate. So leave it be and treat yourself with it. It's truly worth it. (check it out in my store!)
But there are other items I love that are not so exclusive they couldn't be reproduced. One of those products is Gourmet Pasta Sauces. My favorite is the butternut squash pasta sauce. It's creative, so good and so "gourmet" tasting. But at 6.99 per bottle (about 2 cups), I just cant see buying it that often. About a year ago, I thought, "Hmmm. I could make this and I bet could make it better". So I went to town making this. It took several tries in the "Johnson test kitchen" before I settled on something that is so good it really does knock the socks off that bottled sauce. Another plus, I can get 3 meals for 2 people when I make just one batch! Now that's economical gourmet!
I recently saw a bottle of that gourmet sauce on sale and bought it 'cause I thought "nice to have if I don't want to make it" When I ate it, I felt Sad! I liked my sauce so much better. That bottled sauce now seems to be missing something.
So now, the only butternut squash pasta sauce I eat is this one. Delicious, creamy, and flavorful.....it's like a party for your pasta!! While we are at it, lets talk pasta....buy something that is unique that will hold all the gorgeous sauce. My favorite for this sauce is Orecciette - Dome shaped pasta that will hold the sauce like little "scoops".
Here is a TIDBIT of information: DON'T PUT OIL IN YOUR WATER when you boil the pasta. I know it's what your mom taught you, but STOP IT (and I mean that in the most respectful way) Why you ask? Because it makes the pasta sleek and slippery! That way the sauce simply slides off the pasta. Haven't you ever wondered why that happens? Now you know. Trust me, with a sauce this good you NEED to have the pasta hold onto that sauce!
By the way, did I mention this is SQUASH and other Vegetables? It's practically free (WW lingo) making this a points friendly, lite and healthy "Italian" meal.
Buon Appetito!
Butternut Squash Pasta Sauce
The recipe makes between 6-7 cups depending on your squash size. 2 WW PP per generous cup.
(make sure you add calories/points for your pasta!)
1 Medium to large Butternut squash
1 large onion, cut into about 2" chunks
4 Shallots (optional) skinned an quartered
10 large garlic cloves, skinned (left whole)
a handful of fresh sage - chopped
Dried Italian herb seasoning
Olive oil
salt and pepper
a box of chicken broth with a pour top
1/2 cup cream, half &Half or milk
2 Tablespoons butter
1 15 oz can diced tomatoes, drained
Dry white wine or Sherry (1/4 cup or so) OPTIONAL
Red-pepper flakes (optional - sometimes I add them, sometimes I don't)
Preheat the oven to 375 degrees
Cut the butternut squash down the center - remove seeds and pulp

Line a baking sheet with foil and lay the squash cut side down. Pop into the oven.
Meanwhile in a large bowl toss onions, shallots (if using), garlic cloves, sage and quite a bit of Italian seasoning (approximately 1-2 tablespoons). Add salt and pepper and toss with a few tablespoons olive oil until well mixed. Pour into a sprayed or lined baking dish (not too big) and pop in the oven with the squash.
Drain a can of diced tomatoes and put them on a small lined baking dish and pop into the oven with the rest of the ingredients, until they feel "dry".
The squash should be soft to the touch, about 50 minutes. The onions and garlic are done when they look cooked and browned ( a little blackened is OK too). Generally it's pretty close to the same time...but if not, pull each element from the oven when done.
Let the squash cool. Peel and dice it, then toss it into the onion mixture:

The tomatoes should look about like this (I used fired roasted so they were blackened out of the can)

Put the squash mixer in your food processor or blend in batches.

Process or blend until really SMOOTH - while it's processing add chicken broth to desired consistency. Then add the tomatoes and process more until everything is smooth again, adding more chicken broth again.

Add your 1/2 cup of Cream, half and half, or milk. Process until blended.
Pour puree into a pot or saute pan. Heat up and add butter. If using, add bit of Sherry or white wine. You will want about 1/4 cup or less (or more if you prefer!) and cook a bit to get the initial alcohol flavor out.
*** Please do not use that garbage from the vinegar aisle in your grocery store called "cooking sherry" or "cooking wine"! Seriously, would you drink a glass of that? The rule of thumb is if the wine is not good enough to drink, it's not good enough for your food! It will RUIN your dish (then you'll be sad with my recipe!! LOL) Purchase a bottle of Hartley & Gibson's Dry Sherry or similar brand. (it was inexpensive...less than 10.00) and it's excellent. You will want it around to add to other things and it lasts forever. ****
Add a small amount of red pepper flakes, if desired.

Your sauce should look about like this. I like to make it a day ahead and let the flavors meld and mellow overnight. But I also eat it immediately when I cannot wait!
From here, if you are only feeding 2, I put 2 cups of sauce into 3 plastic freezer bags and pop 2 of them in the freezer. That way I have it at a moments notice!
Obviously if you are serving 4,6 or more peeps, you will use the whole batch of sauce....
To make your pasta and put it together
Cook your pasta (I cook about 1-1/2 cups for 2 (about a cup a person) until al dente. Drain and rinse.
Heat a saute pan with olive oil. When hot add Pasta and toss to heat. (I add cooked chicken sometimes, just like I did here) If you are using a protien, toss in now.

When hot, Ladle in sauce and toss to coat. Heat through.

You may need a bit more chicken broth at this stage (I did). Just add it to the pasta and sauce until desired consistency is reached.

When hot (just a couple minutes) divide into two bowls and top with Parmesan cheese.

The result? A very gourmet, creamy and flavorful sauce that isn't "run of the mill". Definitely upscale enough for Special occasions. But serve it on weeknights to simply impress you and your family. They deserve it!
From my home to yours, ENJOY!
Monday, May 16, 2011
Cream Cheese Wonton's

Yesterday was a very fun day. Almost perfect if you minus the absolutely debilitating Migraine. I rested, took meds and then felt a bit better for the afternoon....I had to feel better! You see, my thirteen year old twin nephews, Kyle and Cameron, popped in to help me create this tasty and fun recipe! We love to cook together and they are becoming pretty accomplished at it!
I love to eat with my fingers.....seriously....who doesn't?? Admit it...you know who you are! SO much easier, less to clean up and somehow the food just tastes better. That of course, is my opinion! what's funny is when I was a kid I used to dangle my left hand in my plate all the time! Funny, I loved the way food felt in my hands even way back then!! But my mom would always tell at me to stop by saying "stop doing that! how will you ever find a husband ??" Now this is SOOO funny because I was the first of the 4 to get married, so maybe that wasn't such a bad thing after all! I still love to play with my food...it's just something that I will likely NEVER stop doing! But again, I digress....
Cooking and eating should be fun. But, just because we are on a lite and healthy eating plan doesn't mean we need to forego fun! Finger Food is just that, it's fun, it's creative and it feels like youre eating a lot ! And really, for me what better finger food is there than a cream cheese won ton? OK. For you cheese haters out there, this might not be the recipe for you. But it's cream cheese! That doesn't really count as "real cheese" does it?
Here is my disclaimer. We made them and the family thought they were really good. But don't get excited. They are not Pick Up Stix cream cheese won tons (those are like a million calories/points). But they satisfied the craving and they were fun to put together!
This recipe was a tough one. It took us a while to figure out just how to go about it. Normally when the boys and I cook together, I make up the recipe and type it up for them or I download a recipe before they get here. But this time we created it together! Adding this or that and deciding when the filling was perfect. This was a new experience for them and one that brought about really good results!
The filling is yummy, creamy and (i think) a perfect balance of creamy cheesiness with some OOMPH! But getting that won ton to crisp up without deep frying it was much harder than we thought.
At first we wrapped them like a present, sprayed them and baked them...

and they looked so pretty!!

But they had a doughy after taste that we all agreed "had to go"! So we opted for a different shape and cooking method - FRYING! Now frying without a good amount of oil is tough also. The recipe calls for spray, but if you have extra points, I would definitely use a little oil. The taste and texture were acceptable, so we left oil out. But oil would have been good (but not lite!)
Enjoy the fun of making these with the kids (big or little) in your life!
Cream Cheese Won Tons
WW recipe builder says 3 points for 4 won tons.
1 8oz package light cream cheese (don't use Fat Free) - room temperature
1/4 cup egg substitute
2 tablespoons toasted sesame seeds
3 tablespoons green onions, thinly sliced (green parts only)
Bottled hoisin sauce (this is like chinese bbq - if you dont like it, leave it out or try plum sauce)
salt and pepper (just a pinch of each)
1 package Won ton wrappers
bottle sweet chili sauce or try the Orange-Sesame Glaze recipe (see archive post)
If you haven't purchased toasted sesame seeds, toast them now. (hot dry pan, "saute until golden" pour onto plate and cool).
In your food processor or mixer, add cream cheese and egg substitute and process/mix until very well combined.
Add sesame seeds and green onions and salt and pepper to taste.

Remove won ton skins from the wrapper (be very sure you only have ONE - easy to grab two) and lay 4-6 down on your work surface. Prepare a small finger bowl of water and set next to wrappers.
Heat a non stick pan with low to med heat.
Put a dab of hoisin sauce closer in center:

(That is an "eensy" amount of sauce, but it's a close up so it looks like more...be careful, it's a strong flavor)
Add about a teaspoon of the cream cheese mixture:

Dab two sides with water (make sure the water goes all the way down each side of the won ton). This will be your glue.
Fold the dry corner (opposite the two wet sides) and touch won ton wrapper together and press a bit to seal. Spray the pan, raise the heat and spray the wontons, when the pan is very hot, put the won tons in to "fry" on each side, being careful not to burn them (although I like them kind of burned!).

When browned, Turn them over and fry the other side.

While these are frying, start on your next 4 to 6 and put the fried ones in the oven to warm (about 225 degrees) You should be able to make about 24 to 30 of them.
Serve with sweet chili sauce or the orange sesame glaze (see recipe)

The result? A nicely creamy, tasty and fun finger food that is crispy enough to be satisfying without breaking the calorie bank. Get your kids (or ANYONE) to help you do the work for extra fun and free kitchen SLAVES (Hey! Food bribes WORK!)

From my home to yours, ENJOY!
Subscribe to:
Comments (Atom)